
MODERN KITCHEN BAR STOOLS AND WHY WE CHOSE THEM

Ok, so I promise we're not made of money.  The lamps I shared with you last week were purchased six months ago and I have been oooing and aaawing over these here stools for much longer than that!  Seriously, I am in love with these stools.  They are actually a replica from Tolix made in France (which run between $250 and $300 a piece) and since I am pretty cheap, I hummed and hawed for months and months before I decided to just take the plunge and order the replicas online.  Introducing the Tabouret Metal Counter Stools (set of 2) for $89.99 from Overstock.  Don't you just love all of the fun colors!?!


We purchased two sets of two in the "metal" color which looks more like a shiny grey rather than a metallic finish.  The stools are super sturdy and I believe well-made, for the price, and I am super satisfied with them!  Hubby isn't sold on them exactly since they don't "match" our kitchen but that is kind of the point.  I have wanted to modernize our kitchen and this is the start to some of our upcoming changes!  We also plan to paint the kitchen cabinets and possibly replace the counters.  What an impact that will make!  I'd also love to update the lighting over the breakfast counter and in our dining room...

Here they are in all of their glory!


There wasn't anything specifically wrong with our previous chairs other than they were made chincy and the bolts would sporadically fall to the floor while sitting on them.  The cushions weren't super easy to clean and I just felt like we needed an upgrade.  Something durable.  Easy to clean.  The metal really balances out all of the wood in our kitchen and dining room.  I sure love the contrast it makes between the traditional kitchen cabinets and the modern, more industrial feel and look of the stools.  And really, these stools could fit in a traditional, farmhouse, or modern kitchen.  Love that!  Since they are backless, they don't dominate additional space in the dining area and tuck nicely under the overhang.  Oh, did I mention they are stackable??

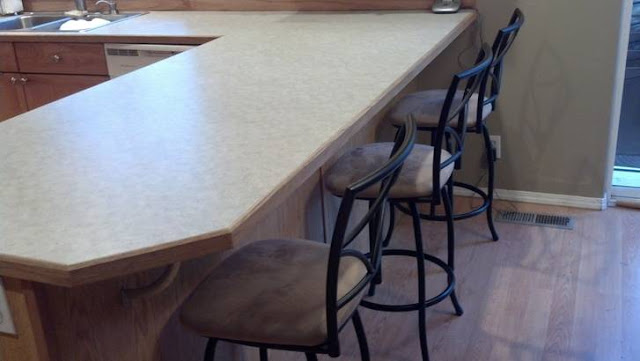
Here are the stools we had previously.  Ignore the soap suds in the kitchen sink!  Ha!


What a difference the stools make!  Again, because I love refreshers, the "before" and the "after" kitchen counter stools.


Hope you are having a great weekend!  We've been so busy and I haven't been keeping up on the blog.  Soon I'll be sharing an update of our P90X progress, Easter, some gluten/dairy/egg free recipes and the day to day happenings.  Stay tuned!  Happy Saturday!

Comments

Popular posts from this blog

DRESSER TURNED TV STAND MAKEOVER

Tonight, I am so excited to share with you what hubby has been working on for the last few months in his spare time.  Let me preface by saying that we've had our TV hanging on the wall above our fire place since we purchased it about a year ago.  And though I liked it there and it fit well, it wasn't exactly what I had in mind.  You see, while the TV is on and you're sitting on the sofa curled up in a warm blanket drinking hot tea, you can't have the gas fireplace running.  Not only do I use the TV for viewing movies and television shows, but I listen to a lot of music through it.  I love our fireplace but would love it more if I could use it!  So to solve that problem I was on a mission to find a nice TV stand. After searching online and finding a lot of great furniture options, I realized I didn't really want to spend any money.  We had a dresser gifted to my husband years ago that we were planning on selling or donating but I really wanted to find a new u

DIY HOMEMADE MOD PODGE

We all know how expensive Mod Podge is at the craft store, right?  And since there are so many projects which use it, I thought I could find a homemade version  online .  Love  pinterest !  This is seriously the easiest DIY project I have ever done. Supplies: A Jar (I rescued an empty Tostitos Creamy Spinach Dip Jar YUMMM which was on its way out to be recycled) Elmer's White Glue (I used two 4 fl oz bottles) Water Before I made the Mod Podge, I washed out the jar and spray painted the lid silver.  I also took off the label from the jar and did my best to get rid of all of the adhesive (first tried a paper towel and rubbing alcohol, but it didn't work and then I tried olive oil and it worked like a charm). Instructions: Empty glue into jar Fill the empty glue bottle with water and pour into the new jar with the glue  (Ideally, you want 50% glue and 50% water) Shake, Shake, SHAKE the jar That's it!  You have made homemade mod pod

TWO YEARS | remembering our miscarriage

We all have that day. The day when our world changed forever. For us, it was the day we lost our little one. I don't cry much anymore, but I remember. The pain isn't raw as it once was, but I will never forget. I remember the day I found out I was pregnant. The day I told my husband he was a daddy to be. I remember the dreams we had for this baby. Our hopes. Our plans. Our future. I remember our normally un-snuggly dog coming up to me and nuzzling her head under my arm pit, resting her head on my belly as if she knew there was a little life growing inside of me. I remember the prayers. So many prayers. We prayed every night for this baby of ours. For their future. For their health. For their life. The unbelievable love. The warmth of the sun and the smell in the air. I remember the darkness descending. The blood. The emergency room. The tests. The feelings of fear. The spoken words. The reality dawning. The unimaginable pain. The surgery. The pain isn't